Cura 4.7.1 is latest software which has included the i3, so we can add the printer manually.
 Cura 4.7.1 download
  Instruction on adding i3
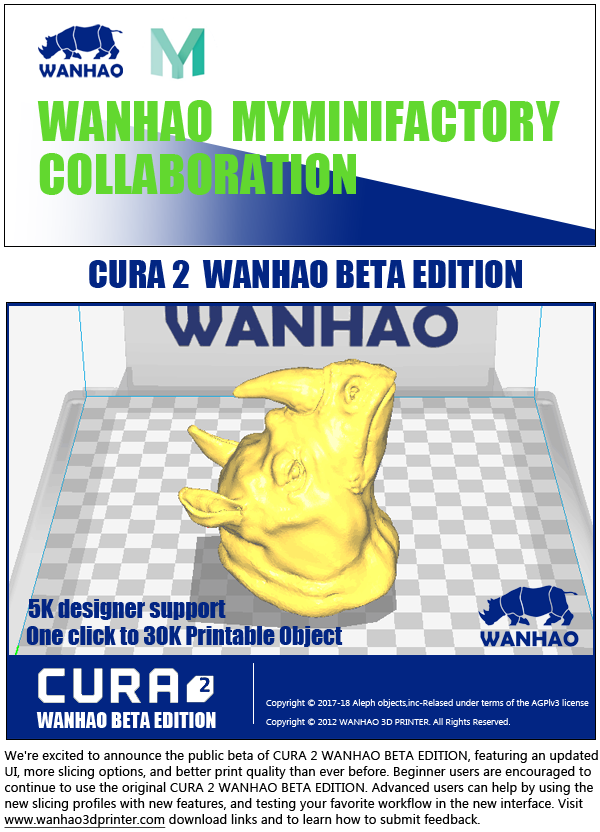
We're excited to announce the collaboration between WANHAO and MYMINIFACTORY, featuring an updated CURA 2 with direct MODEL download and print, more slicing options, and better print quality than ever before. Beginner users are encouraged to continue to use the original Cura WANHAO Edition.
CURA 2 Dropbox Download. Click to download.

Windows OS
i3 User Manuel

UNBOXING AND HARDWARE SET UP
For printer received before 1st June. Please use Revision B.
1. Wanhao i3 Unboxing and Hardware Set up. REV.B Download
Software User Manuel
Software Download
1.  Cura 16.01 Download
2.Cura 15.04 Download
3. Cura_14.12 Download
4. CURA WANHAO BETA EDITION
3. Cura-15.02.1-MacOS.dmg Download
CURA WANHAO EDITION USER MANUEL
1.1 Cura
Overview
We recommend that new users start with Cura as it includes a slicing engine. Host software we recommend to use Repitator. There is separate introduction of Repitator.
Slicers
These programs take the 3-Dimensional model (typically STL/OBJ/etc) and determine the 3D printer toolpath based on the options selected. The slicing engine uses the nozzle diameter, printing and movement speeds, layer height and other variables to determine the coordinates where it needs to move and the rates at which it will do so. This information is exported out of the program as a gcode file. The gcode file is a plain-text file with a series of text-based codes and a list of the complete X,Y and Z axis coordinates used for printing the 3D model. We recommend that new users start with Cura as it includes the printer host as well.
Setup Cura
Cura is available for download on our website at /Down/ShowArticle.asp?ArticleID=56 When installing, it is recommended to uninstall any previous versions of Cura you may have been using. When first opening Cura, you will be prompted to go through the First run wizard. This will consist of selecting your printer. It is important to select the correct printer , as Cura uses custom profiles and machines settings based upon which printer you are running.
1.2 Installing Cura
Download Cura on our website and run the exe file.
When you run the exe file, the very First screen you will get is to choose the file location choose the location and press next as shown below:

After pressing next the next screen will ask you to choose the component and the formats you would like to open in Cura. Make the selection as below and press next.
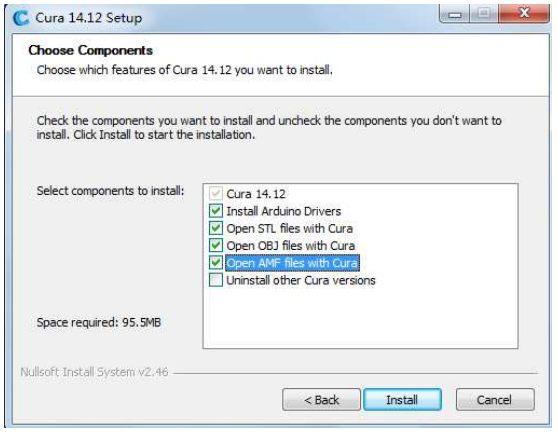
Now press next to complete the installation.

Now Press Finish button to finish the process:

Now you will see the Front screen of Cura with all the options as shown below: 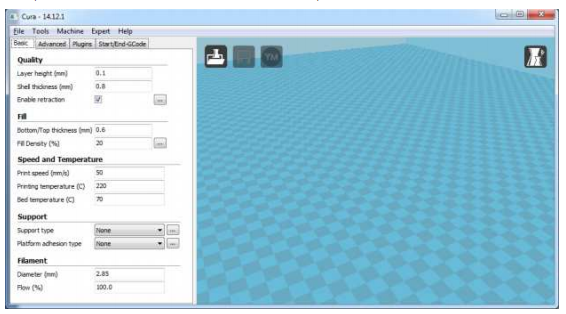
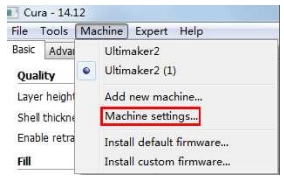
Now to print with our machine go to Machine option in the header and select add new machine
option.
Now select the radio button with the option as follows: Other (Ex: RepRap, MakerBot, Witbox) and press next button.
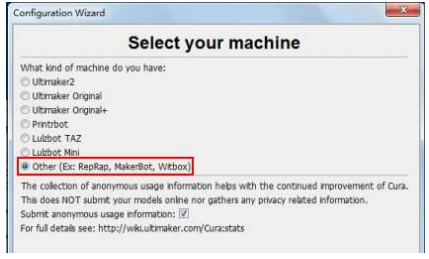
Then Choose Pursa Mendel i3 and click next.
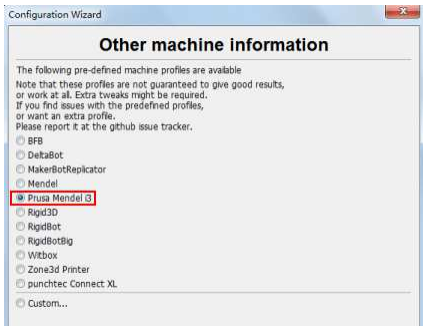
Now press Finish and you will be redirected to the below screen:
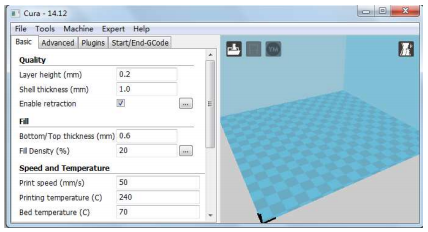
Now load the object with the Load File button as shown below and make the changes in the parameters as shown in the image.

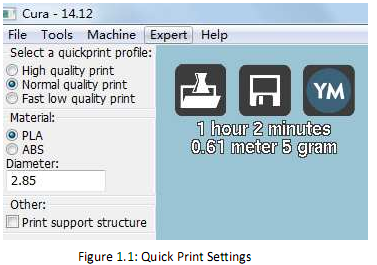
1.2 Quick Print Settings
After setting up Cura for the first time, you will be shown the main interface screen. (Fig. 1.1)