WANHAO i3 series Unboxing and Hardware Set up
I3 UNBOXING I3V2.1 UNBOXING
 Download
 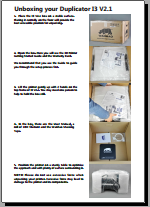 Download
WANHAO i3 First Run Experience
 Download
WANHAO i3 Evolvement
i3V2 Improvement i3V2.1 Improvement
 Download
 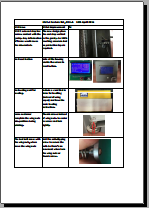 Download
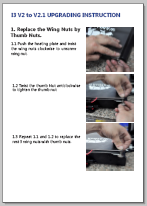 V2.1 upgrading manual
Wanhao i3 Unboxing and Hardware Set up.
We packaged your Duplicator i3 very carefully at the Wanhao Bot cave -- we hope you¡¯ll read this
guide and be just as careful unpacking it. In fact, you should always be really careful with The
Duplicator i3. Here are a few things to keep in mind.
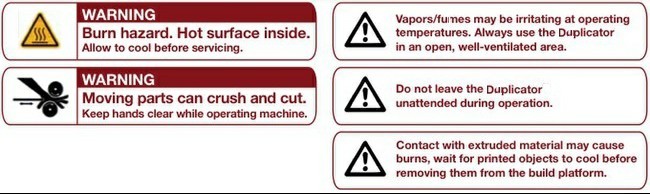
Safety In Safety Information formation
1.1 Caution: The Duplicator i3 generates high temperatures and includes moving parts that can
cause injury. Never reach inside The Duplicator i3 while it is in operation, and allow time for The
Duplicator i3 to cool down after operation.
The Duplicator i3 is sensitive to electrostatic discharge. Make sure you don't have a static charge
on you by touching a grounded object before operating The Duplicator i3 or attempting any adjustments. If opening The Duplicator i3 for service, ensure that the power supply is turned off and the cord is disconnected.
Package Contents
Here are the items that should be found in the Duplicator i3 package:
-The Duplicator i3
-Single Step exstruder MK10
-1x spool holder
-Hex Wrench and bolt Kit
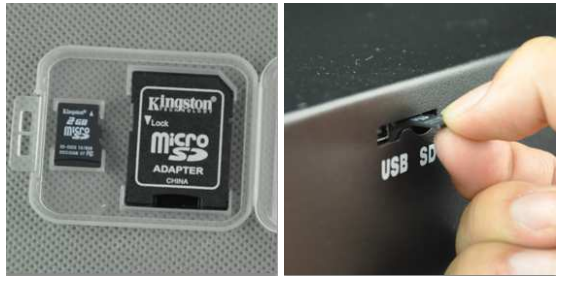
- 1 x SD card
-2 x Wanhao platform tape
-10 meters PLA filament
-1 x Power supply cable
-1 x USB A to B cable
-1 x filament stand
Unboxing
2.1 The Duplicator i3 is packed very tightly and carefully -- take your time unpacking it. In this section, the names of important parts of the machine will be in bold type.

First, place The Duplicator i3's box on the work table next to a clean, flat work space. Put the
upside down. Open from the bottom side. Turn the upside up and pull the box up. So you can
clear all the protection foam and cut all the white secure ribbons.
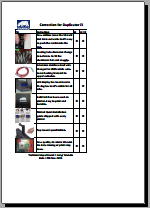
1. Cut the ribbon 2. Get the spare parts box out

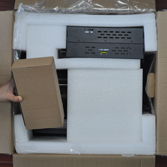
3.Take the foam out 4.Take off the box
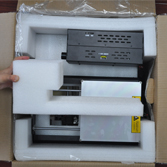
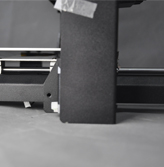
5. Put the Base onto a table or floor. Never drag the black cable.
6. Put the control box onto table or floor.
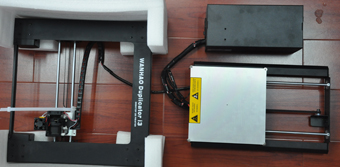
7. Stand the tower on the table. 8. Cut the white secure ribbon.
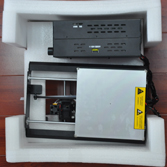
9. Raise the right X axis manually. 10.Raise the left axis manually.

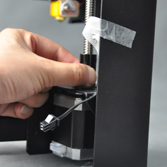
11.Insert the Base into the tower and match the bolt hole.
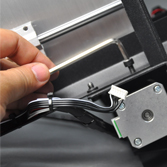
12. Lock the 2 bolts on left, right side.
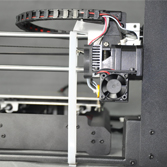
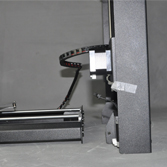
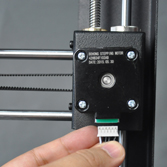
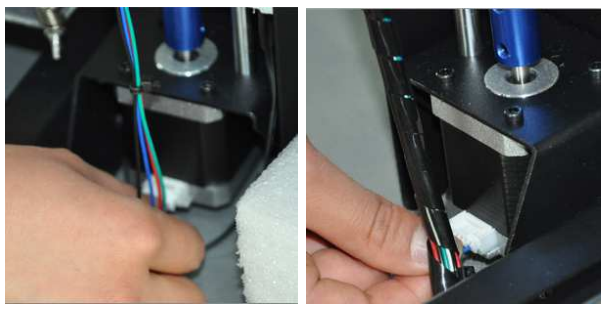
13.Turn printer aside, Lock extra 2bolts inside base 14. Lock the left motor cable
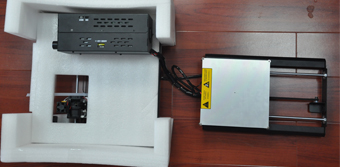
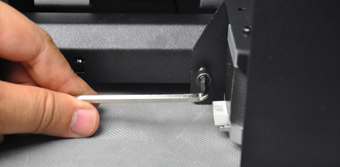
15. Cut the black ribbon 16.Short cable for Z; Long for X, black for end stop switch
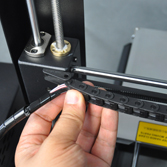
17. Insert longest into the X axis motor. 18. Insert the drag Chain into socket
Note: the black cable is not a handle! Never lift The Duplicator i3 by the black cable 2.3

. Gently pull The Duplicator i3 out of its packaging and place it on your work surface.2.4
In the packaging underneath your Duplicator i3 you¡¯ll find the Power cable, as well as your USB A
to B cable and Filament. Take these out and put them aside.
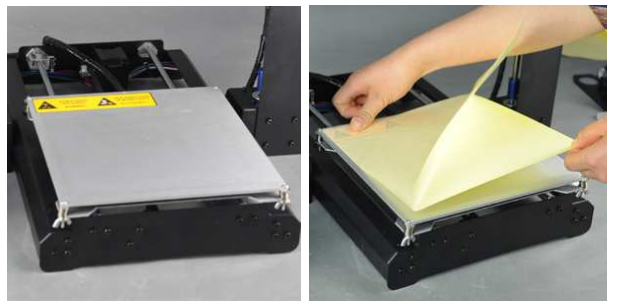
You should be able to see the build platform: it¡¯s an aluminum plate. Tear off one Wanhao
Masking tape to cover the plate.
You have now finished unpacking your Duplicator i3! We¡¯re really proud of it! Also, we
recommend that you keep the box that it was shipped in for future transport and long-term
storage.
The Duplicator i3 Diagram
Before we continue, let¡¯s familiarize ourselves with some of the main features of The Wanhao
Duplicator i3.
3.1 Front:
1. Step exstruder MK10
2. Build Platform
3. LCD Interface Panel
5. SD Card slot (on side panel)
3.2 Back and side:
6. Power switch£¨110V or 220V£©
7. Power input
8. USB cable input
9. spool holder

Initial Hardware Setup.
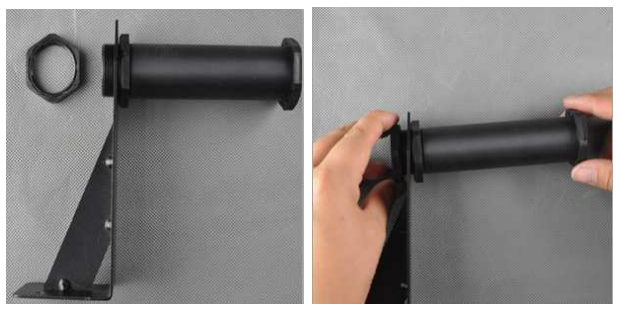
Now, set the Spool holder on the control box. Insert 2 screws through the 2 holes of spool holder
stand. Lock the 2 screws onto the stand. Then insert the filament spool holder through the stand
hole and lock it by 2 plastic nuts.

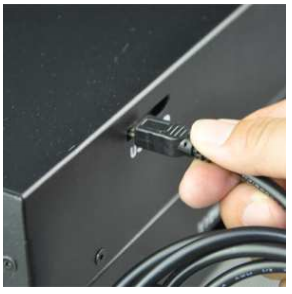
Almost finished! Check your Power Supply power switch. There are 2 voltage option, 110V and
220V. Make sure you are setting the switch at right voltage according to your local power supply
voltage. 4.6 Note:this is a 2 voltage Power Supply Unit which can accept 110V and 240 V ,AC at
50/60 hz. It also has a standard IEC cable input to accept international cable types if you¡¯re out
side the China. Next, plug the cable into the Power Supply socket, next to the power switch. 4.7Before connecting anything, make sure that the Duplicator i3 power switch is in the OFF position and the switch is at right voltage of your local area.

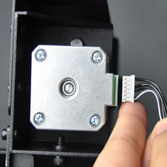
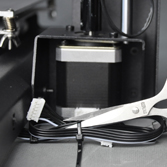
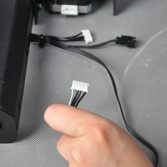
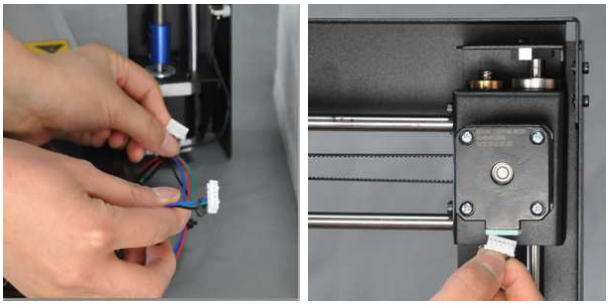
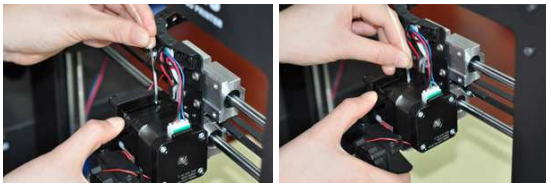
To protect the motor cable from damage during shipping, we have unplug the Z axis and X axis
motor cable connector. You need to insert the connector into the socket when you start. The longest cable is for X axis. And the other 2 male connectors quite near the female connector are
for Z axis motor. Just insert them.
Last, open up your WANHAO filament(not included in the printer box) and mount them on the
Spool holder.
We do recommend to print from SD card only. If you need to update the firmware in future, locate the USB A to B cable and plug it into the USB B port on The Duplicator i3. Don¡¯t plug the other end into anything yet. For updating firmware, check www.wanhao3dprinter.com ----software downloading.
Guess what? You¡¯re done with initial hardware setup! Take a moment to relax and mentally
prepare yourself for what lies ahead.
When you¡¯re ready to flip the switch and make your first prints, head to the next step, the First
Run Experience.
REV.B. changes
1. Adding the damper pad.
2. Folding packing.
WANHAO i3 FRIST RUN EXPERIENCE
Safety Information
1.1 Caution: The Duplicator i3 generates high temperatures and includes moving parts that can
cause injury. Never reach inside the Duplicator i3 while it is in operation, and allow time for
the Duplicator i3 to cool down after operation.

The Duplicator i3 is sensitive to electrostatic discharge. Make sure you don't have a static charge
on you by touching a grounded object before operating The Duplicator i3 or attempting any
adjustments. If opening the Duplicator i3 for service, ensure that the power supply is turned off
and the cord is disconnected.
All set
First, make sure that you¡¯ve completed all the steps in the Unboxing and Hardware Setup section:
your Step extruder MK10 should be bolted in place, your filament spool amounted, and your
spools of filament mounted on the spool holders. You can plug in your power supply now, too. 2.1

If everything is ready, then flip on the power button on the back of your Duplicator i3 and hold
onto your hat. Not literally, though -- if this causes a large gust of wind, you should probably contact tech support at support@wanhao3dprinter.com .
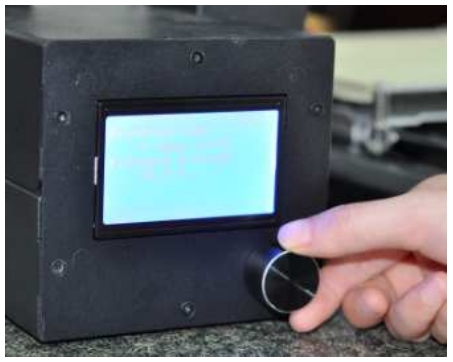
The Duplicator i3 will now guide you through initial setup and your first print. You should see a
WANHAO LOGO on the LCD screen. 2.2

There is one black aluminum button beside the LCD screen. Turn and push to navigate and make
selections.
Then this guide will help you to level the platform, load filament, and start a test print.
Follow the following instructions to set up your Duplicator i3 for the first time! And remember, if
anything goes wrong, or things aren't happening the way this guide says they should, check out the
Troubleshooting page or get in touch with Support.
Leveling Your Platform
Pay close attention: leveling your platform is very important to print quality!
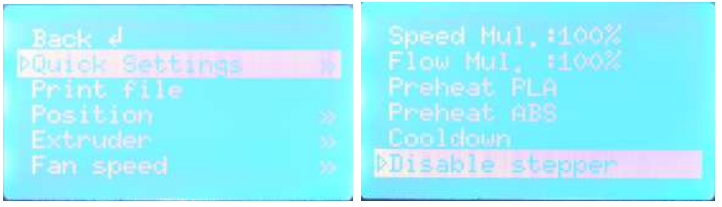
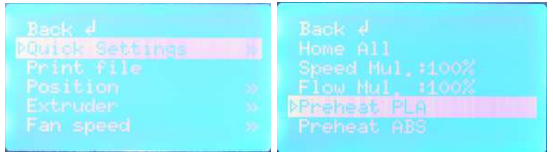
First navigate to Quick Setting---Home All. The extruder should move to left bottom side of
printer.

Navigate to Quick setting---Disable stepper. Then there¡¯s no power on every motor. So you are
able to move the extruder on X axis freely. And the printing platform can move on Y axis freely
too. By hand move the extruder to different positions over the build platform, while adjusting the
spacing between the extruder nozzle and platform with the knobs under the platform and a sheet of
paper placed between the platform and nozzle.
Note:
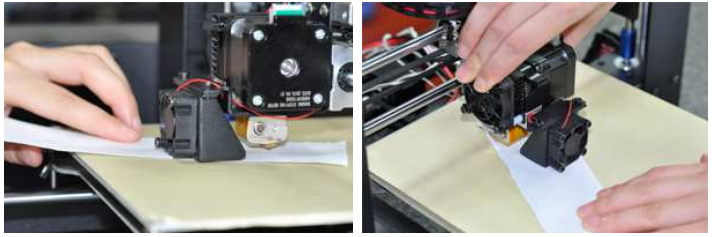
To level the build plate, you must adjust the four knobs which under the build platform. These four
knobs lower and raise the build plate.
• Tightening the knobs [turning them to the right] moves the build plate away from the extruder
nozzle.
• Loosening the knobs [turning them to the left] moves the build plate closer to the extruder nozzle.
• The distance between the extruder nozzle and the build plate should be about the thickness of
the A4 paper. It's about .12 mm thick, and should work great. If you haven't got the Support card
on hand, a sticky note works well, too.
Here is reference chart for correct distance between nozzle and platform.
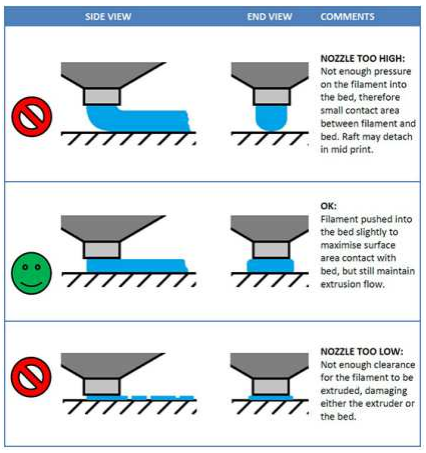

When you're done, The Duplicator i3 nozzle height is OK. 3.5
If your platform is too low, your prints might not stick to the surface, and if it's too high, the nozzles could tear the Wanhao Masking tape on the platform surface. If you're having trouble, or if you just need to level your platform again, you can always get back to the leveling Build Plate
Loading Filament
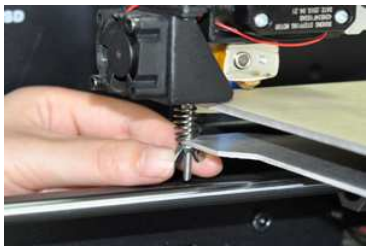
4.1 The first step of filament loading is to cut the filament tip as sharp as possible. And navigate to
Quick Settings¡ªPreheat PLA. The printer will start heating the extruder until the target
temperature met.
4.2 Make sure to push the extruder spring lever down to open the filament route to the heating chamber.
4.3 Meanwhile insert the filament into the filament hole until the very end of extruder. Then
release the lever and you can feel that the filament is grasped by the extruder tightly.
4.4 Navigate to Extruder¡ªExtr.position. Turn the buttom clock wise to load the filament.
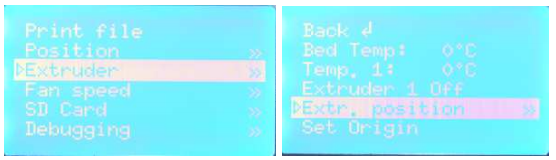
Make sure that the filament loads up from the upper side of spool, so you don't get jams during
printing. After you¡¯ve fed the filament through, stop twist the Black Button. The machine will
Stop extruding.
IMPORTANT NOTICE
You¡¯ll have to wait for a few minutes for them to heat up. Be careful not to touch the bottom of
the Step exstruder while it¡¯s heating -- it gets up to about 220¡ã C, which is hot and can burn you!
4.6 - 4.7

Once the nozzle is at temperature, you can load filament.
You'll have to use to use some force, but as long as you¡¯re holding only the filament, you can¡¯t
hurt your Duplicator i3.
Maintain pressure on the filament, and release the spring lever and after a few moments you should feel the motor pulling it in. Then you¡¯ll see some plastic start to come out the nozzle. When that happens, you can stop turning the black Button. Don't be surprised if you don't see the color you expected -- there's probably still a bit of plastic inside the extruder left over from the testing process.
After The Duplicator i3 is done extruding, wait a moment for the extruded plastic to cool down
before you pull it away. You can discard the plastic in your normal garbage, or recycle it, if your
recycling system can handle PLA. Don't leave plastic clinging to the extruder nozzle -- if you do,
newly extruded plastic might stick to the nozzle instead of the build platform.
The Duplicator i3 will give you a couple of chance sat this before continuing. If you don¡¯t get it
quite right the first time, you can load filament by press the spring lever and insert the filament.
Your First Print
Now your Duplicator i3 is ready, if you¡¯re ready to print. 5.1 Make sure your Micro SD card is in
the Micro SD card slot at the right side of The Duplicator i3 control box. Then, if you¡¯ve
successfully leveled your platform and loaded filament into your extruder, answer yes! The
Duplicator i3 will drop you into the ¡°Print from SD¡± menu. Select one of the prints we pre-loaded
onto the SD card and watch The Duplicator i3 go to work!